Installing and Using ComfyUI
Despite my initial reservations, I switched to ComfyUI late 2023 and have never looked back. Thanks to the vast and rapidly growing adoption of this application, there have been vast improvements in functionality and features in 2024.
This post is here to help you get over any anxiety or fear of learning ComfyUI – because it’s incredibly powerful and has TONS of add-ons available (we’ll discuss these later).
Installing ComfyUI
Local Install
- Method 1 – You can install ComfyUI as a prepackaged build for Windows via this Direct download link. Simply extract the zip file (using 7Zip) and run the run_nvidia_gpu.bat file to launch ComfyUI.
- Method 2 – You can install Pinokio, a simple GUI application that has a one-click installation for many AI apps, including ComfyUI. Pinokio is available for Windows, Mac, and Linux.
- Method 3 – Manual install from ComfyUI’s GitHub page.
RunPod Install – Cloud GPU
Alternative to running locally, this requires some initial funds to be spent to explore the ComfyUI space. The beauty is that you can start with as low as $0.40 per hour. Cloud GPU, such as those provided by RunPod, means that you are running an instance of ComfyUI in the cloud, and as long as your Pod is available, it will run, and at the end, you can delete the Pod; note that if you don’t delete, there may be some ongoing storage charges by RunPod, as you are still using disk space.
My Recommendation
Local is better, as there is no time limit, and ease of use is greater. I started with Method 1 and then moved to Method 2, so I would recommend this if your GPU is able to support it.
Running ComfyUI
Running ComfyUI is quite easy; simply launch via Command Prompt/Terminal: `python main.py`, which will start your ComfyUI interface, and you should get a link at the end of the script. Do not close the Command Prompt/Terminal window where you launch the script, or you will accidentally end the application.
Upon successful launch, you will receive a URL like http://127.0.0.1:7860.
Click on the URL to open the site in your favorite/default browser.
Understanding the ComfyUI Interface
As I said in the intro, thanks to many developments in 2024, the interface is even more feature-rich and easy to follow. Study the below UX design as I cover the different buttons and features of a default interface.
Top Navigation bar
This top navigation bar comprises of ComfyUI menu, where you can save/open workflows, edit and clear workspace (that’s the gray area in the middle where the Workflow is), there is also a help menu when you need help. Next to that, you have tabs, where each workflow opened can be switched between. Towards the right of that, you have Toggle Bottom Panel, which shows you logs of ComfyUI as it runs your workflow, this is good to see what’s happening under the hood and also to see what’s gone wrong in case something does.
Finally, the burger icon ☰ as it’s often referred to as is a toggle switch which will toggle on/off all menus.
Left Navigation bar
This bar lets you browse into the Queue, Node Library, Model Library, Workflows.
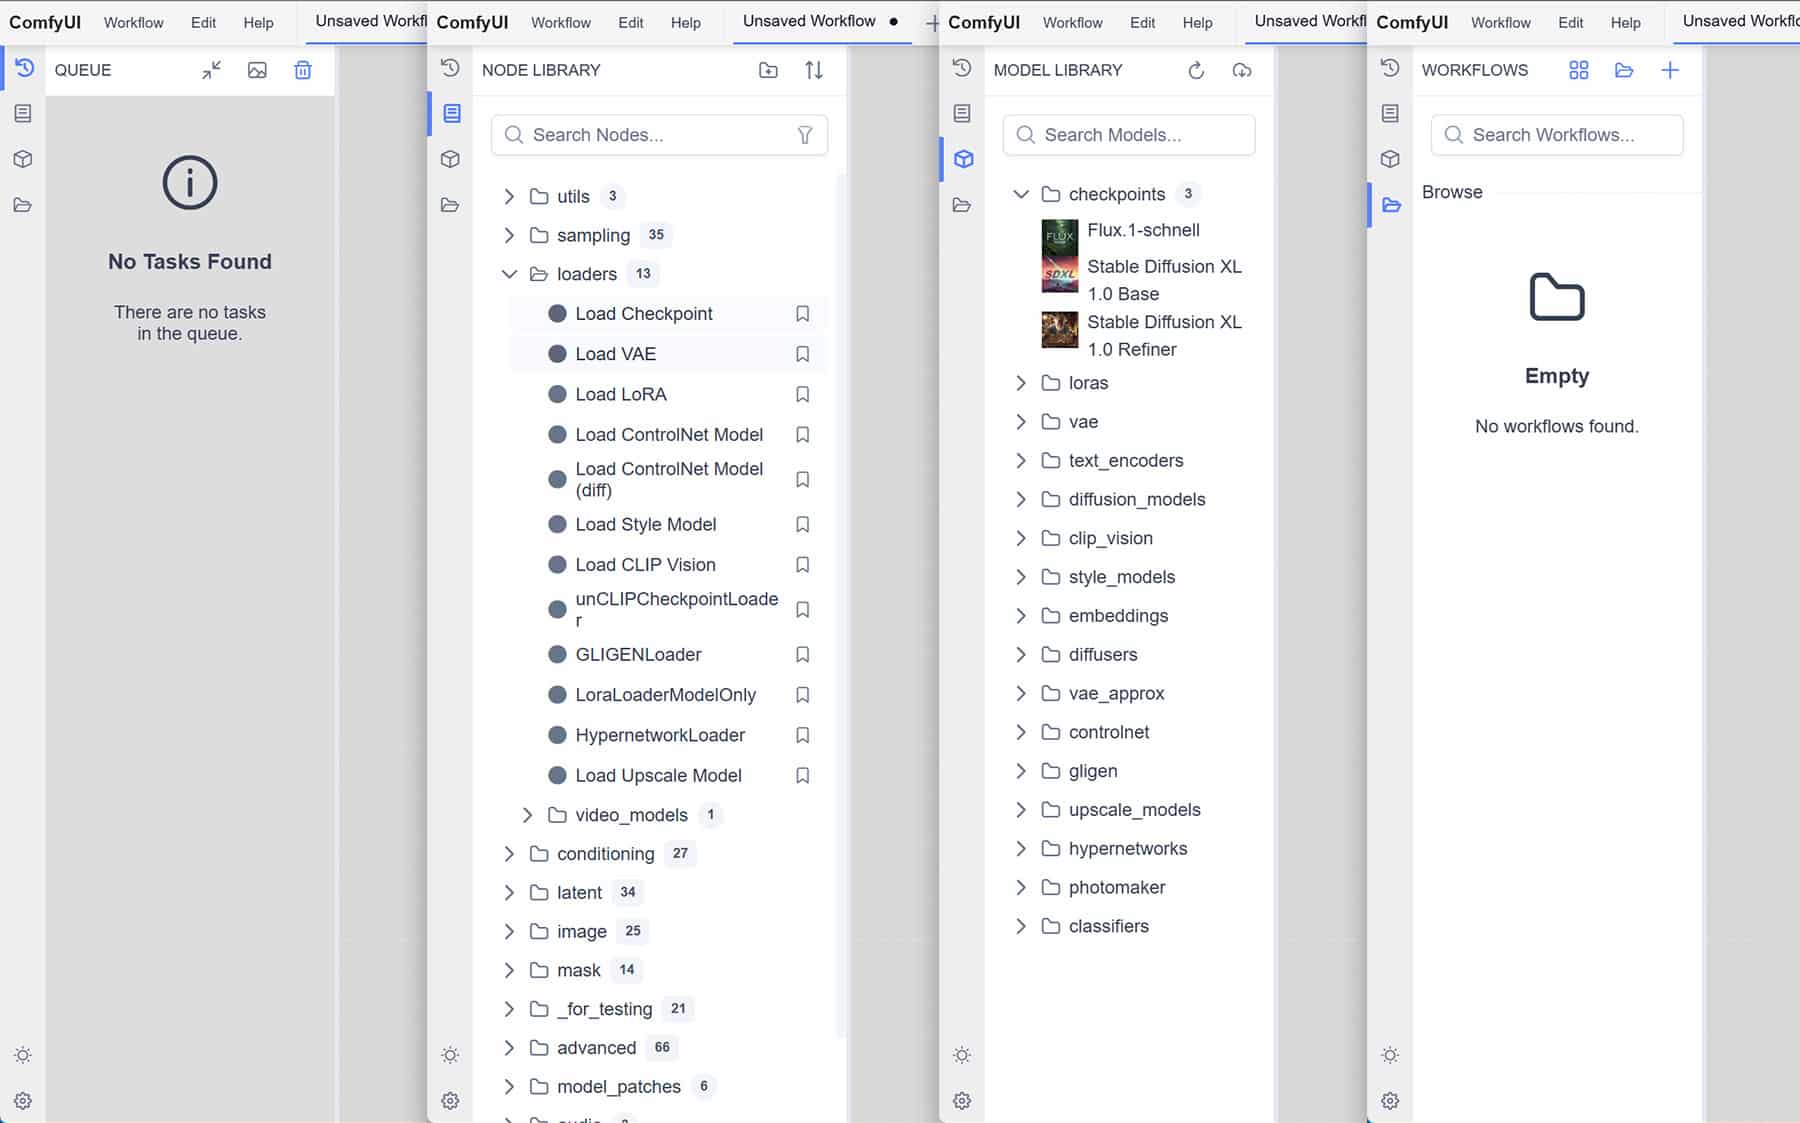
- Queue – this shows the current task and past tasks.
- Node Library – this lets you browse the nodes that are used to build workflows. You can browse by category folders or search via the search bar.
- Model Library – this lets you browse what model Checkpoints you have as well as download new ones, including other things like LoRAs, Controlnet, Clip Vission etc
- Workflows – lets you browse your workflows folder so you can access your saved workflows as well as access some sample workflows included.
Towards the bottom end of this left navigation bar, you have the light/dark working mode of your environment. The gear icon is your typical Settings menu where you can fine-tune the settings of ComfyUI. Not something you need to delve into at the starting but certainly good to know where to find it.
Example Workflows
ComfyUI comes with an enormous amount of Workflow examples; a workflow is a set of ComfyUI nodes connected to accomplish a task, it’s like a recipe you create and can share with others.
You can search our site for various ComfyUI Workflows and also check out the many examples shared by the author of ComfyUI.
The workflows are typically exported in JSON format (text-based file) or PNG if an image is generated from the workflow. The PNG will have typically the workflow embedded inside it, again if you open the PNG in a text editor, you will see JSON format code at the start of the file.
This also makes it easy to export and share your workflows with others in the community.
Red Box Error in Workflow
Often when you download an example workflow from our site or other standard examples, you may find that the workflows loads but then you get a popup error stating “missing” nodes and after you acknowledge the error, you get something like this.
<img src="https://weirdwonderfulai.art/wp-content/uploads/2025/01/ComfyUI-2025-error.jpg" alt="" class="wp-image-12156" srcset="https://weirdwonderfulai.art/wp-content/uploads/2025/01/ComfyUI-2025-error.jpg 1800w, https://weirdwonderfulai.art/wp-content/uploads/2025/01/ComfyUI-2025-error-1280×821.jpg 1280w, https://weirdwonderfulai.art/wp-content/uploads/2025/01/ComfyUI-2025-error-980×628.jpg 980w, https://weirdwonderfulai.art/wp-content/uploads/2025/01/ComfyUI-2025-error-480×308.jpg 480w"