Write an article about
Working as a freelance character designer requires a solid understanding of one’s own creative process and the ability to deliver artwork in a fast-moving pipeline.
As an artist, it’s your job to come up with creative ideas quickly by putting pen to paper and visualising briefs for various clients. Every project will have its complexities depending on the assignment, the deadline, and the art director who will help guide the work. Being reliable and maintaining good communication is key to building positive working relationships.
You may like
Brian works as a freelance character designer with a long list of clients that includes Disney, Framestore, Nerds Candy, Baskin Robbins, Google Play, Cricket Wireless and 2 Minutes animation.
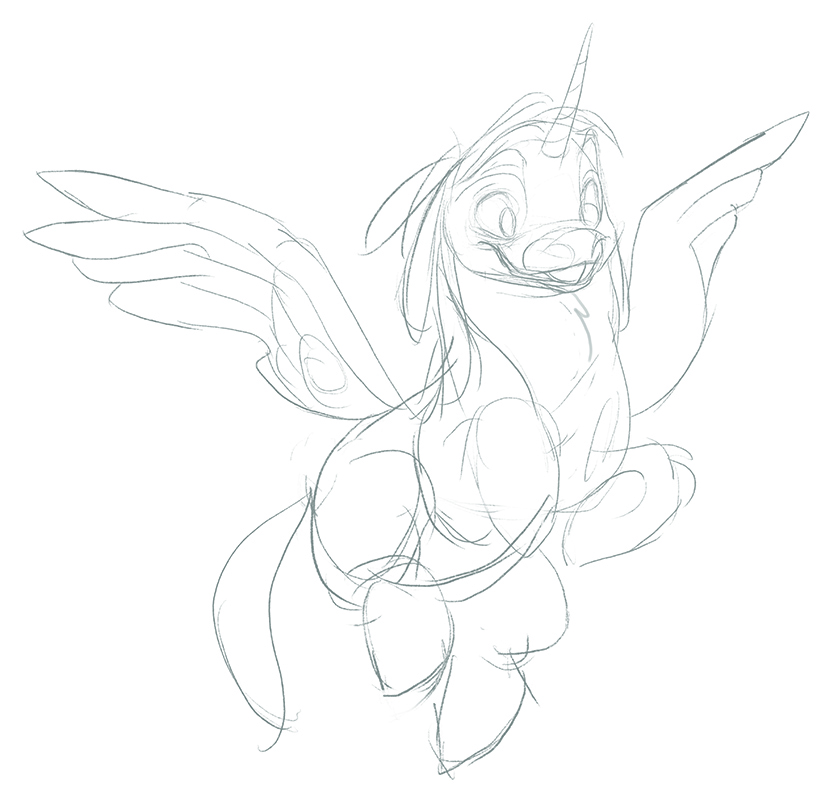
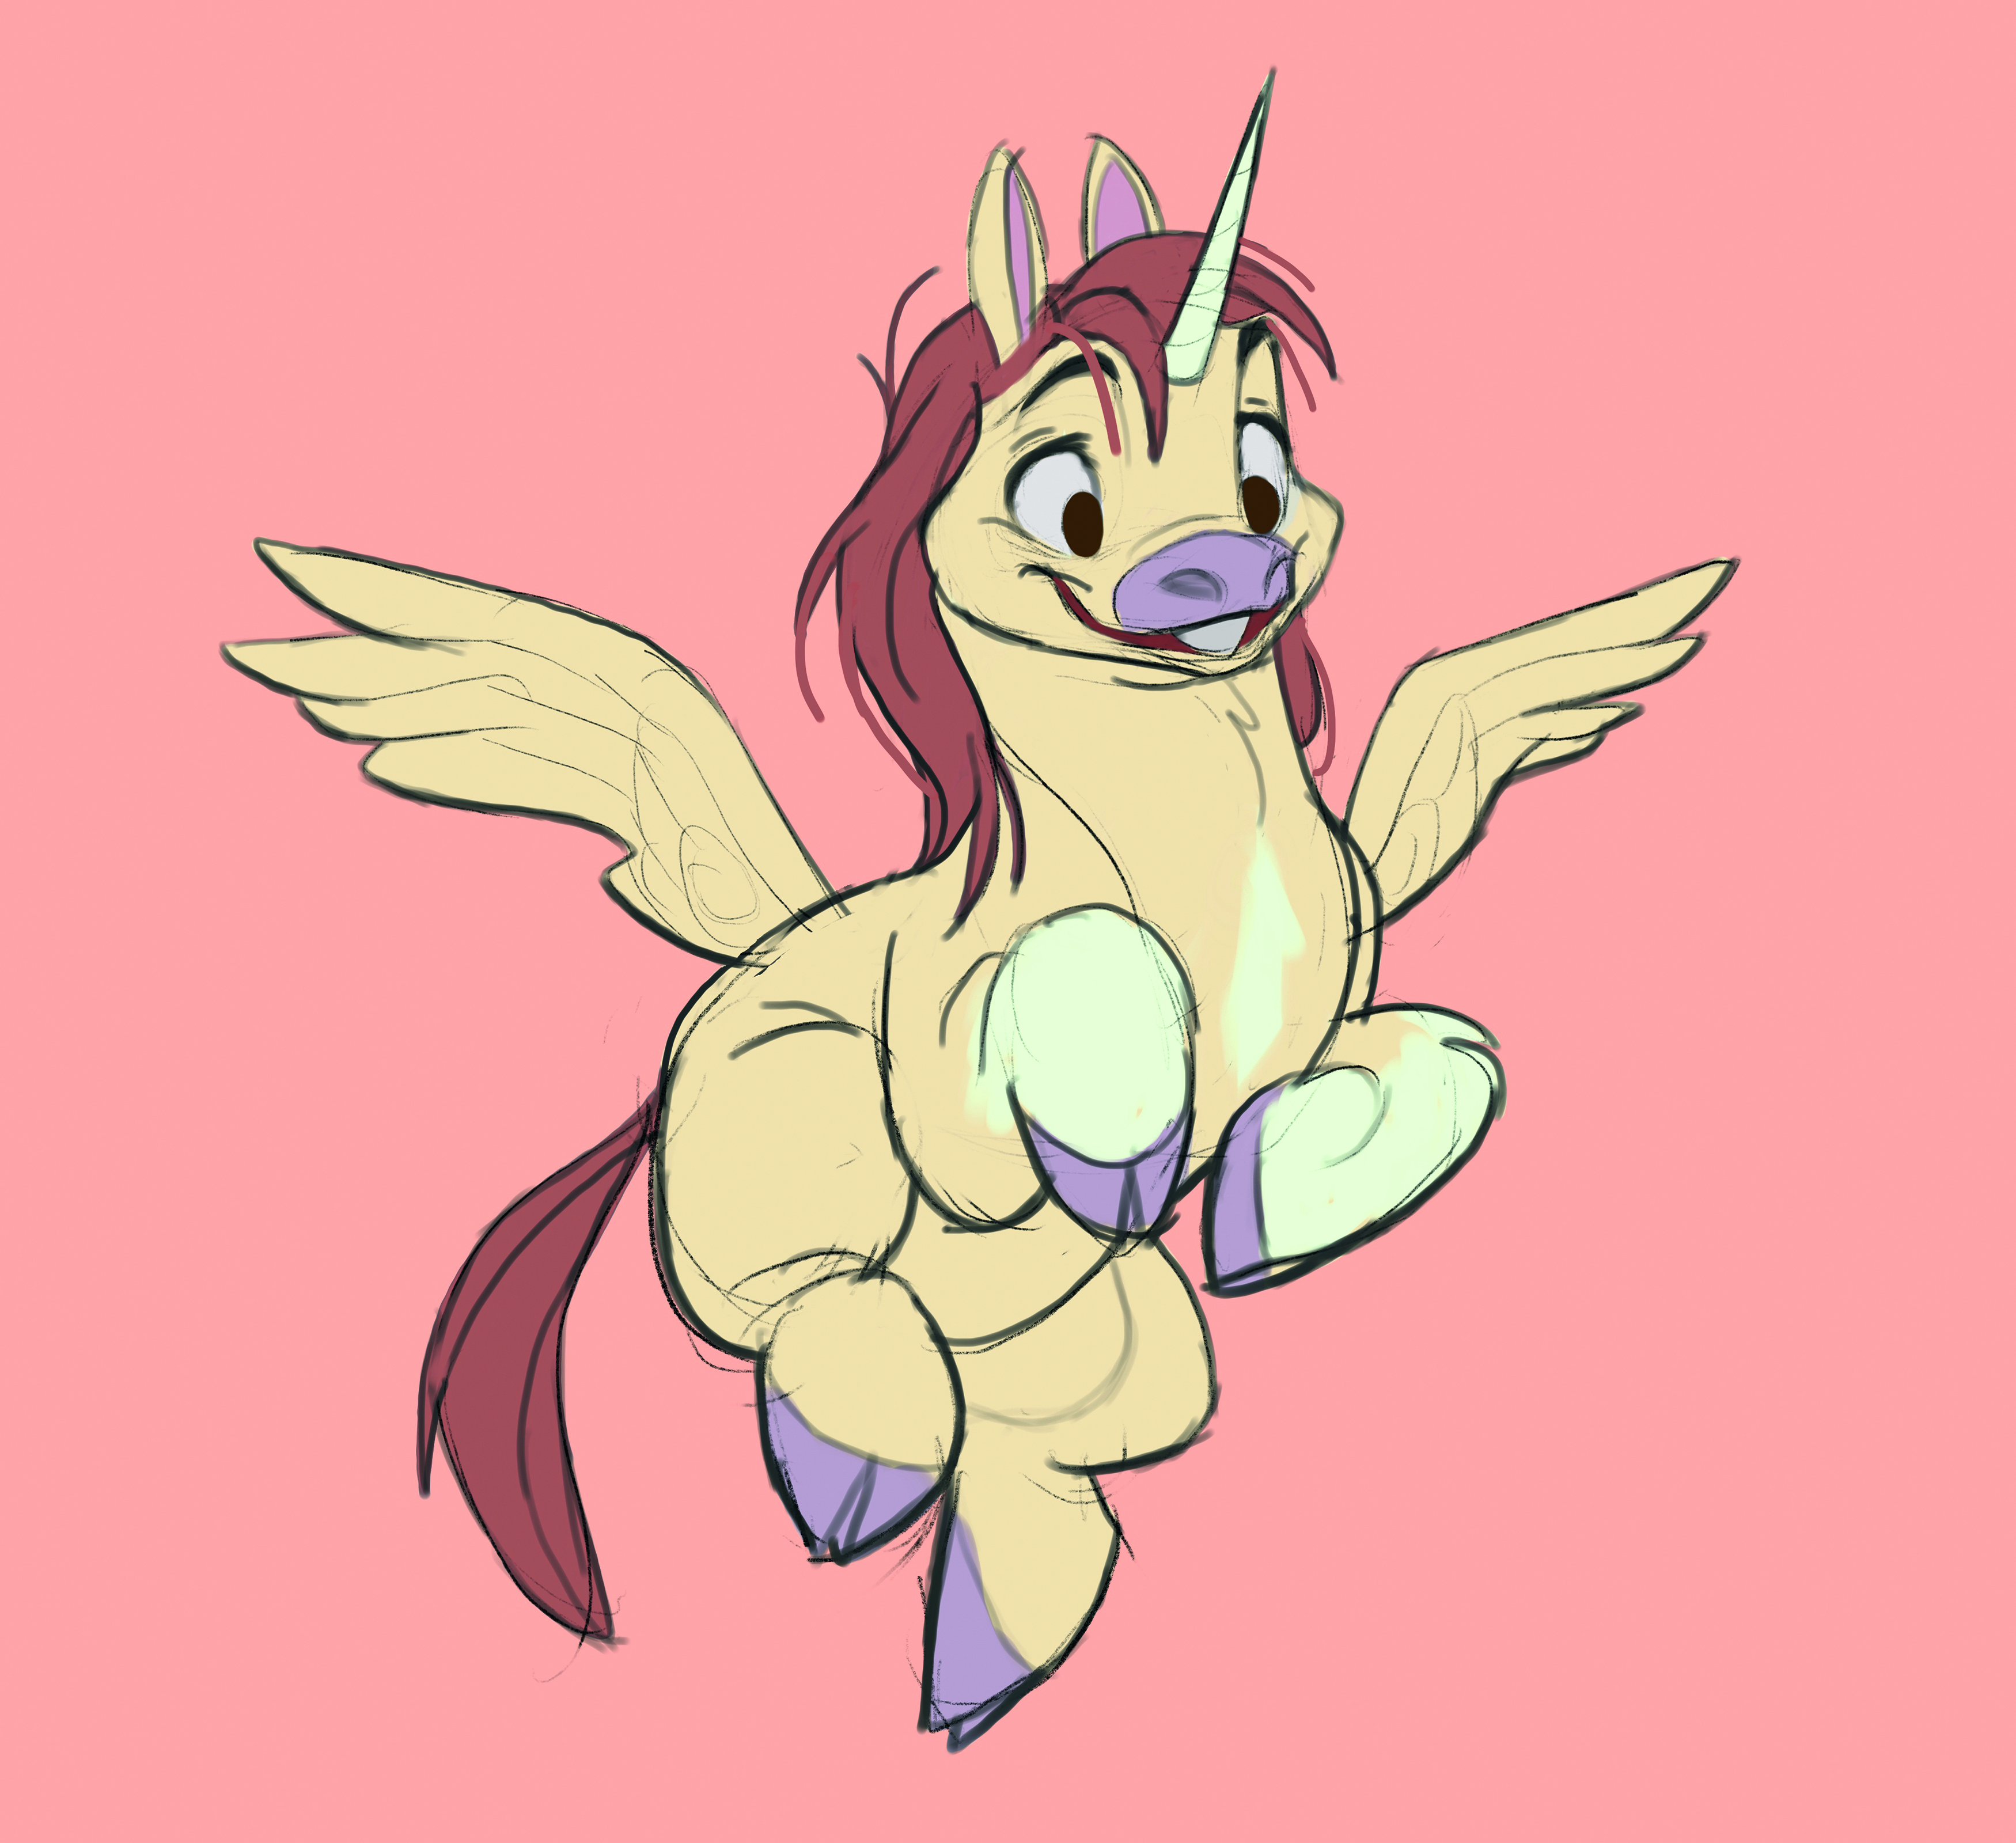
01. Making a loose concept sketch
(Image: © Brian Weisz)
When you begin sketching, it’s important to have a general idea of who the character will be. Starting with storytelling elements will help you nail the look and feel of the character.
Is it a big brooding character or are they small and shy? Maybe they’re a small but confident character with a larger-than-life personality. In the early stages, focus on the shapes and take note of what they communicate.
The first step when designing a character for a client is to begin with some research. Deep dive into the subject matter and start collecting photo references to create a mood board – take note of what you do and don’t like.
For this design, I knew I wanted to create a chubby, cute unicorn that looks like it could be related to a donkey. I typically sketch using the Procreate Sketching 6B brush.
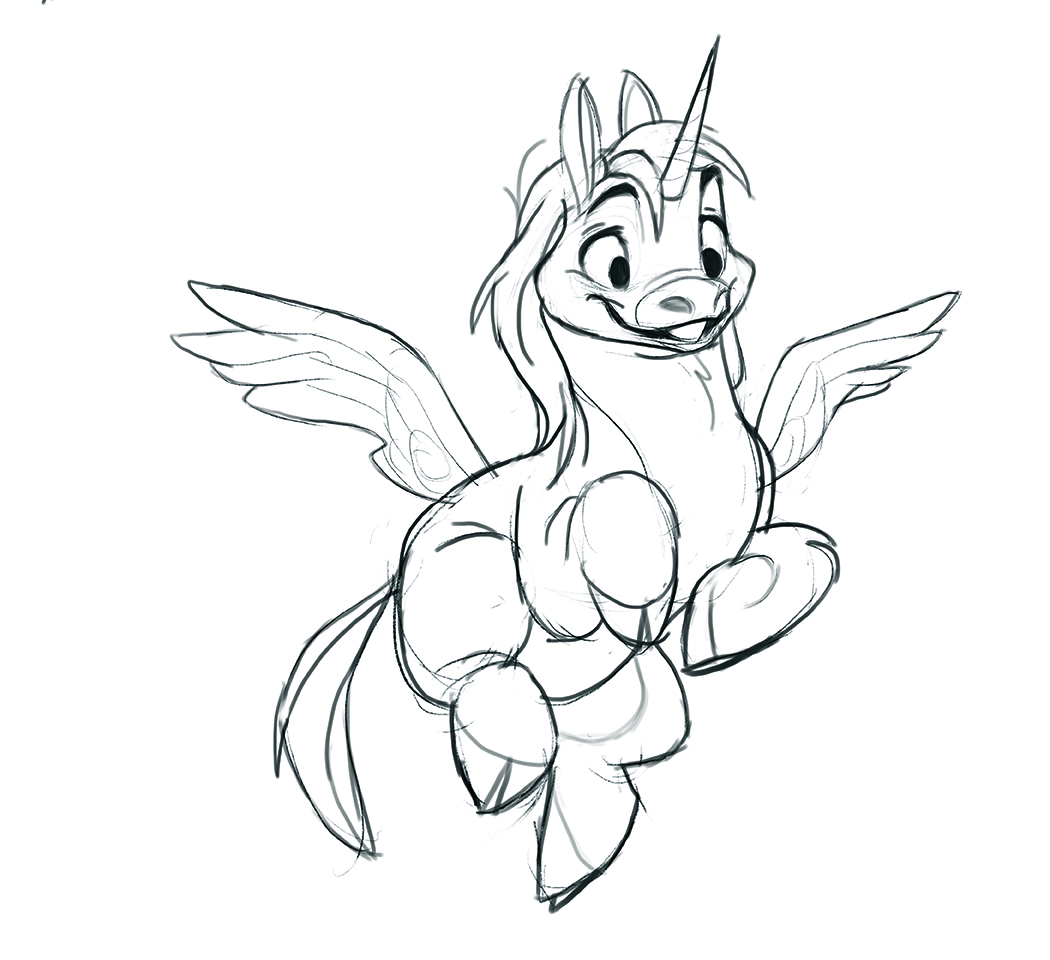
02. Reworking and clean up
(Image: © Brian Weisz)
I often create a copy of my project or a copy of the sketch before making alterations so I can refer back to previous stages. In my initial sketch, I felt the wings were slightly too big. Continue to stay loose at this stage before committing to a specific design.
Turn the opacity of the initial concept sketch down and create a new layer to draw on top. Sketch in a light grey value and eventually darken the line to see it in black.
At this point, I like to fill in the pupils and thicken up some of the line work so that I can see the character more clearly.
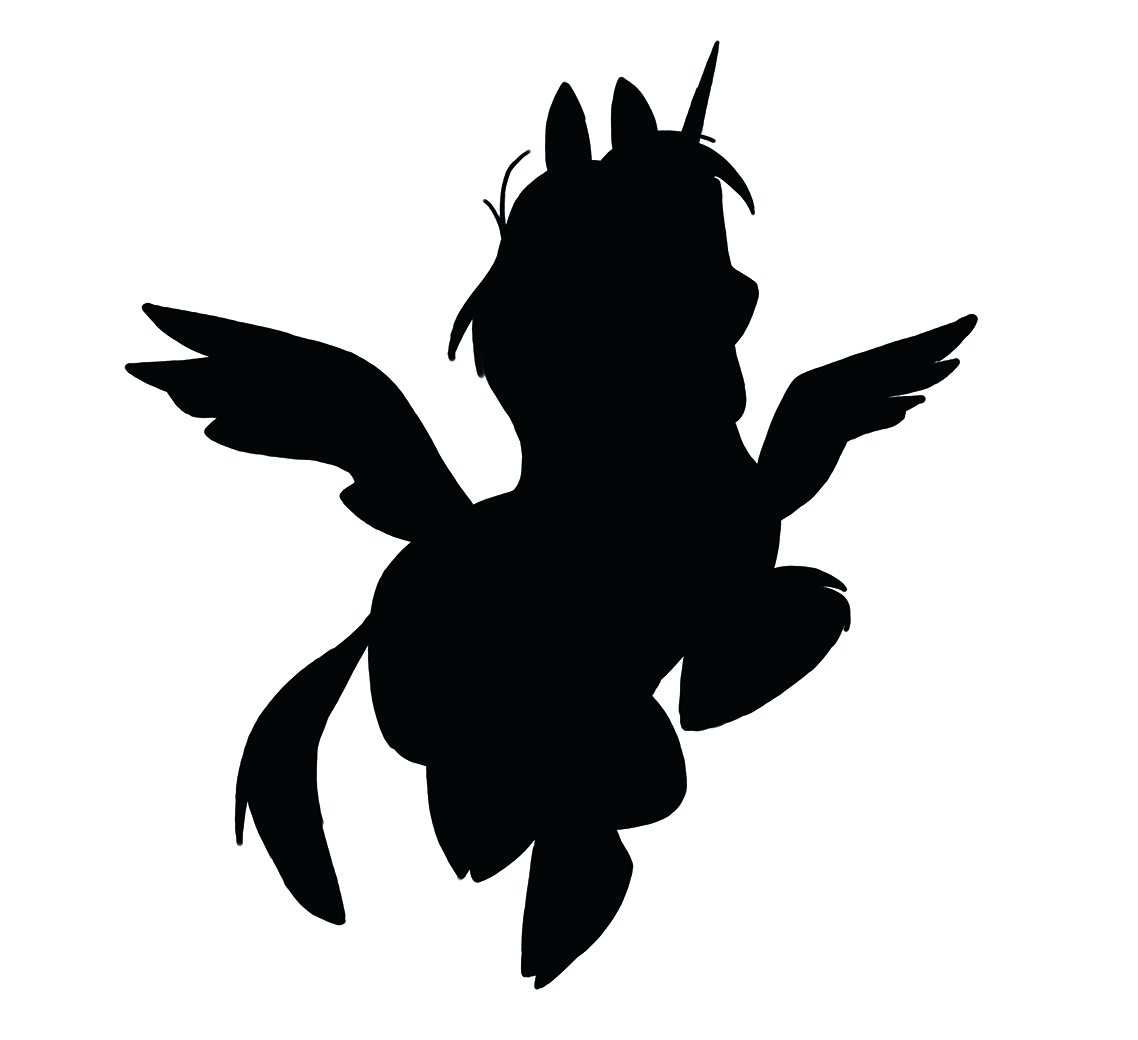
03. Blocking in the silhouette
(Image: © Brian Weisz)
The silhouette of a character should communicate their personality. Turn the opacity way down on your drawing, create a new layer and place it underneath your drawing. Zoom in so you can see the edges clearly.
Using the Hard Airbrush tool in Procreate, or an equivalent, take your time and fill the shape to get a clean silhouette. I usually fill in the shape with a neutral grey or off-white colour before adjusting it to black.
Ask yourself, can you get an idea of who or what the silhouette shape is supposed to be? Does it communicate the idea you had in mind?
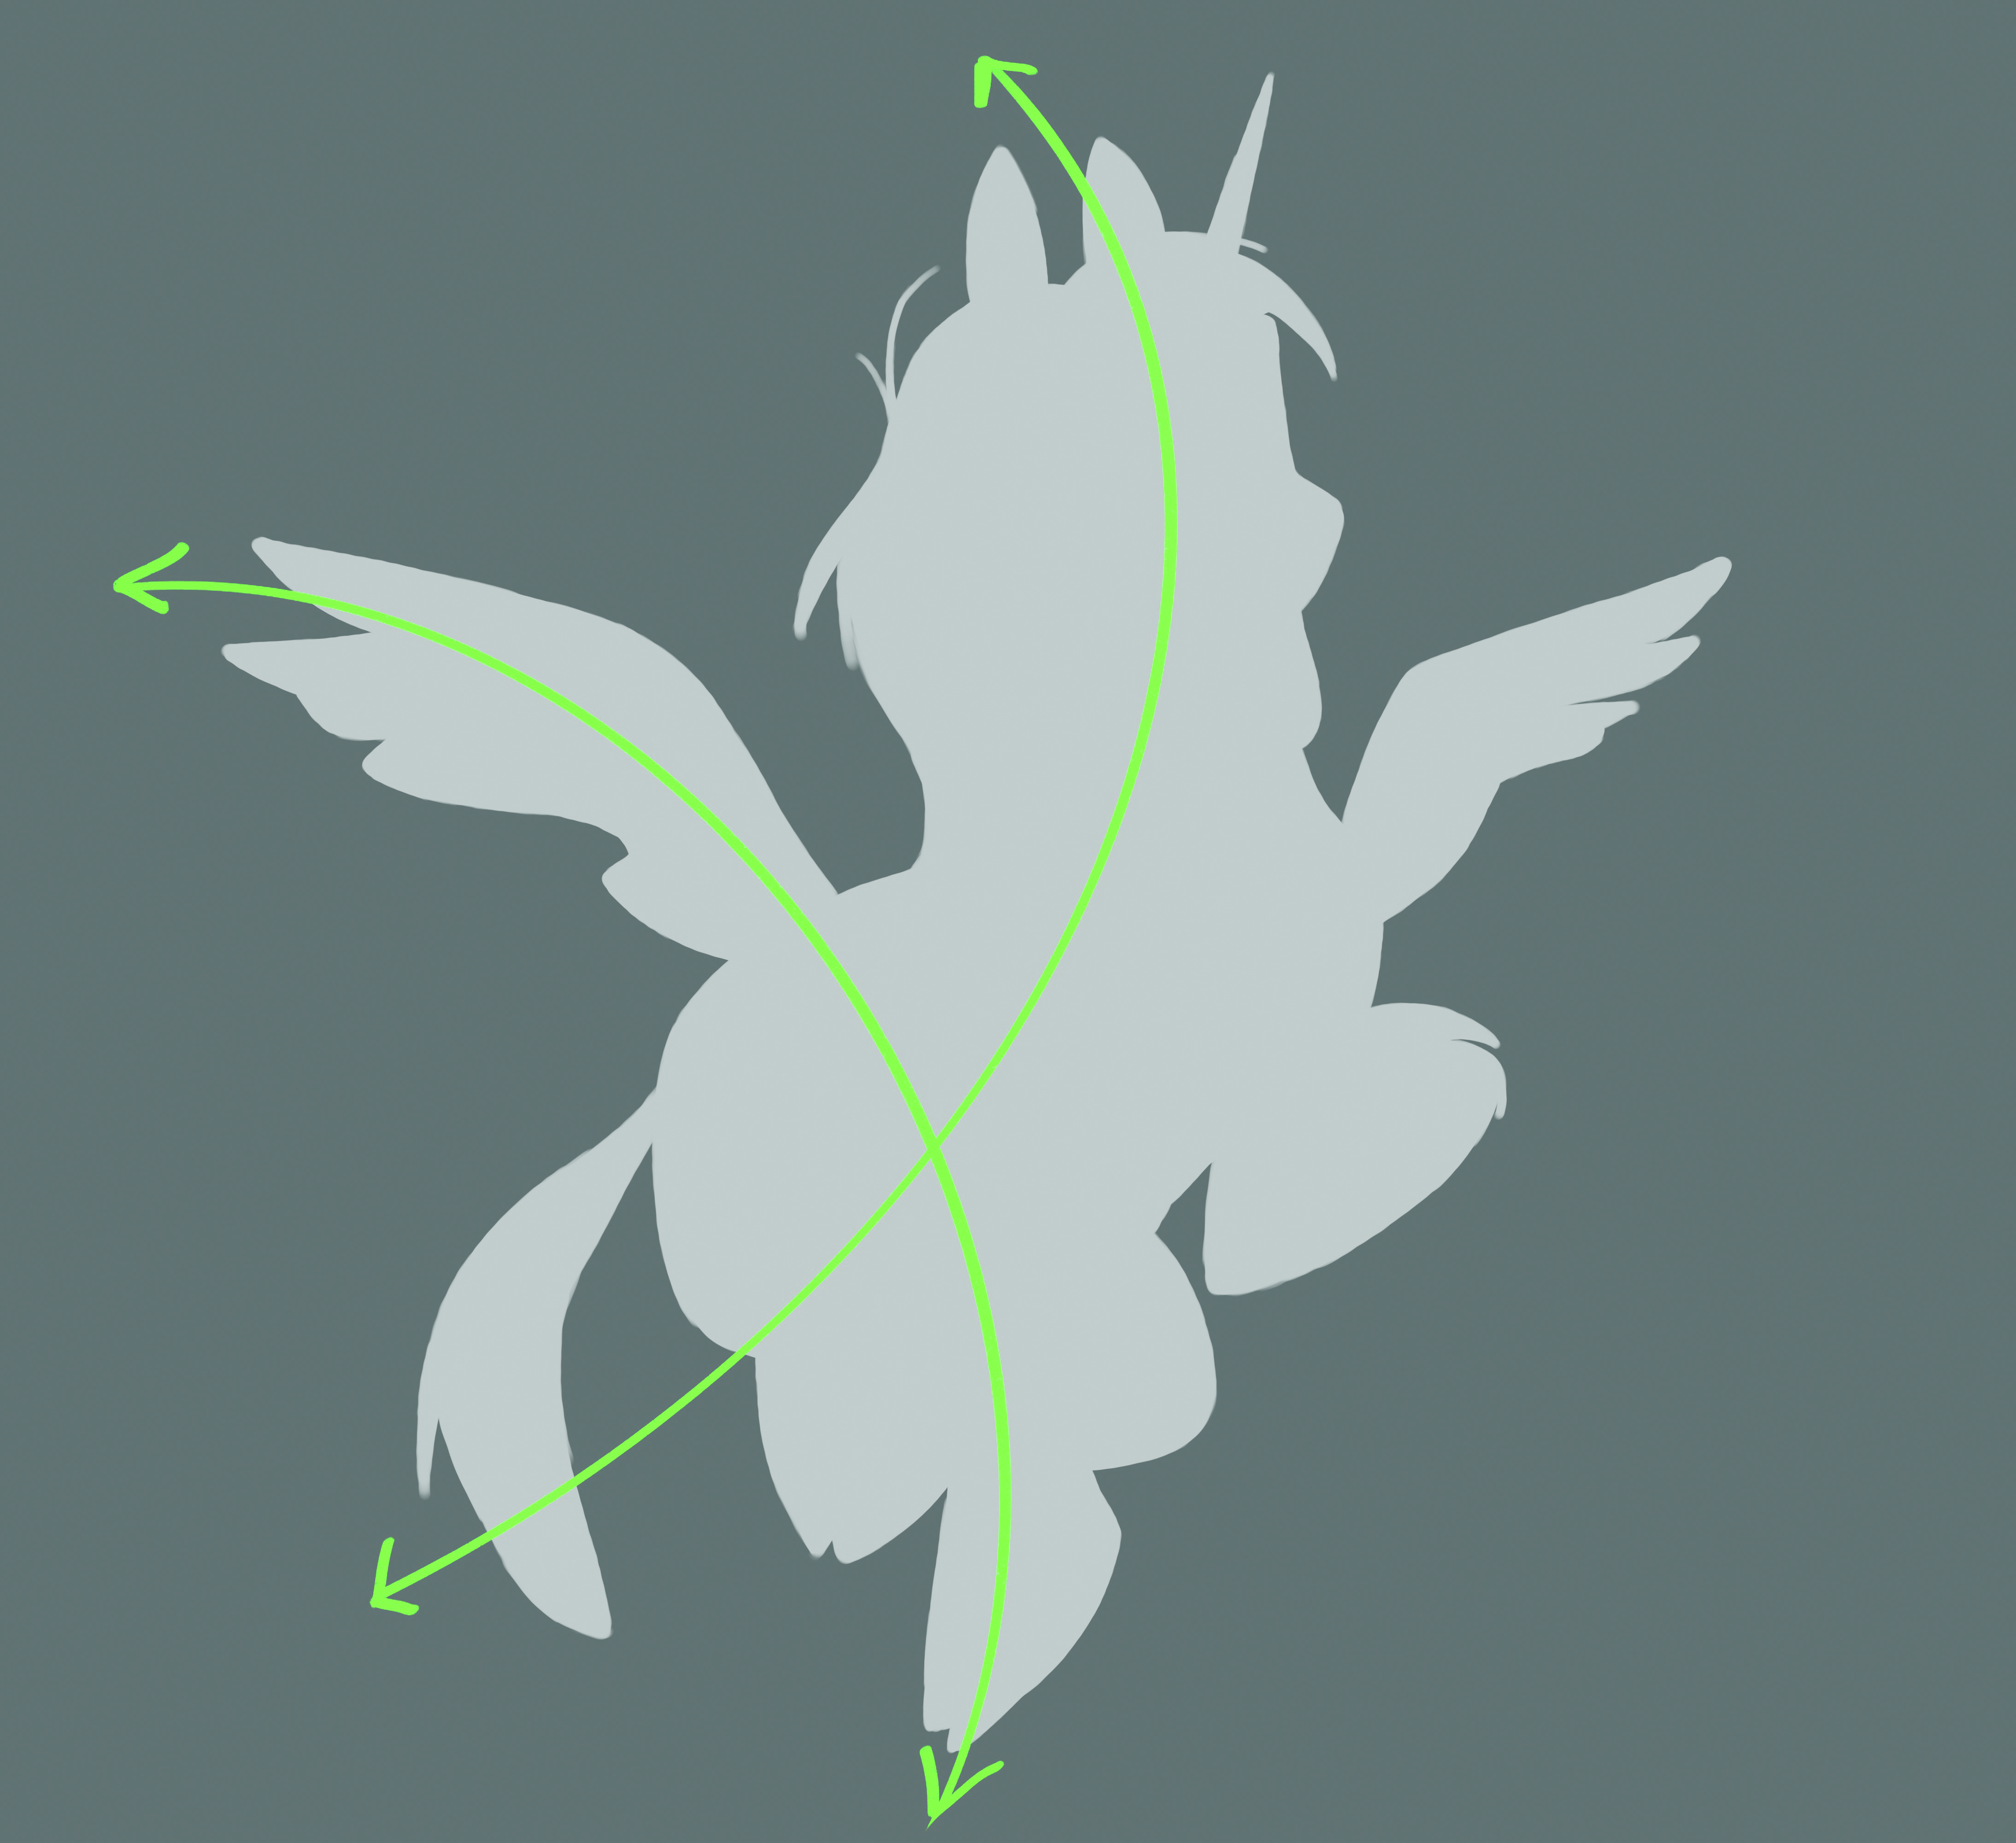
04. Creating lines of action
(Image: © Brian Weisz)
A line of action is an invisible line that runs through a character to provide an energetic flow or expression to the shapes. Without considering this design aspect, a drawing could end up looking stiff or lifeless.
The line of action is something to consider in the early stages of your drawing. Look at the work of artists you admire and try to find the line of action in their designs.
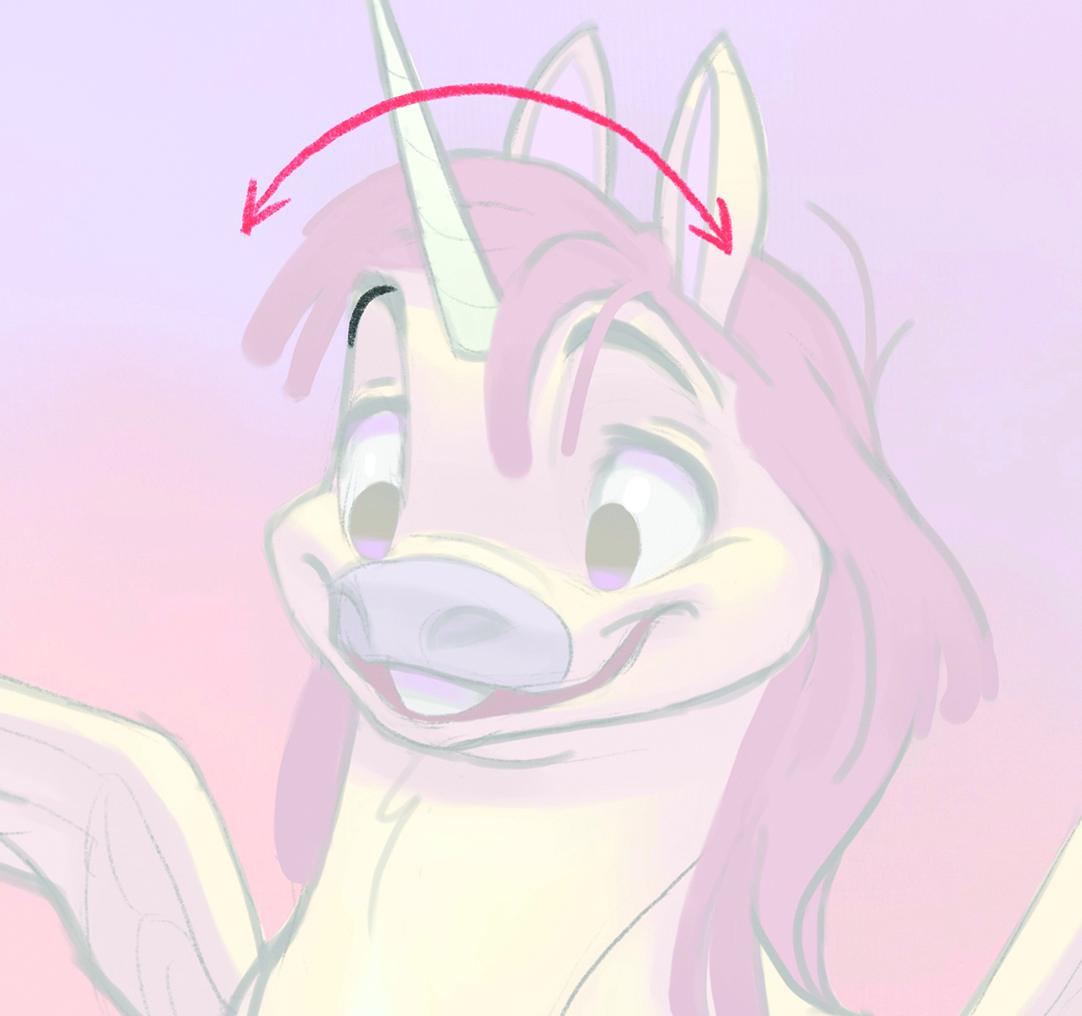
05. Separating the parts
(Image: © Brian Weisz)
To split up your character, block in a flat colour for each section. Next, assign a new layer for each part; for example, the hooves and snout are on one layer and the hair shapes on another.
Clients will often ask you to make adjustments, and separating the sections allows you to makes changes with ease. At this stage, begin to consider the colour temperatures and colour relationships as they relate to the character.
I decide to move forward with a warm colour composition as opposed to a cool one. These colours are rough but they establish a starting point that determines the root of each hue.
06. Exploring the colours
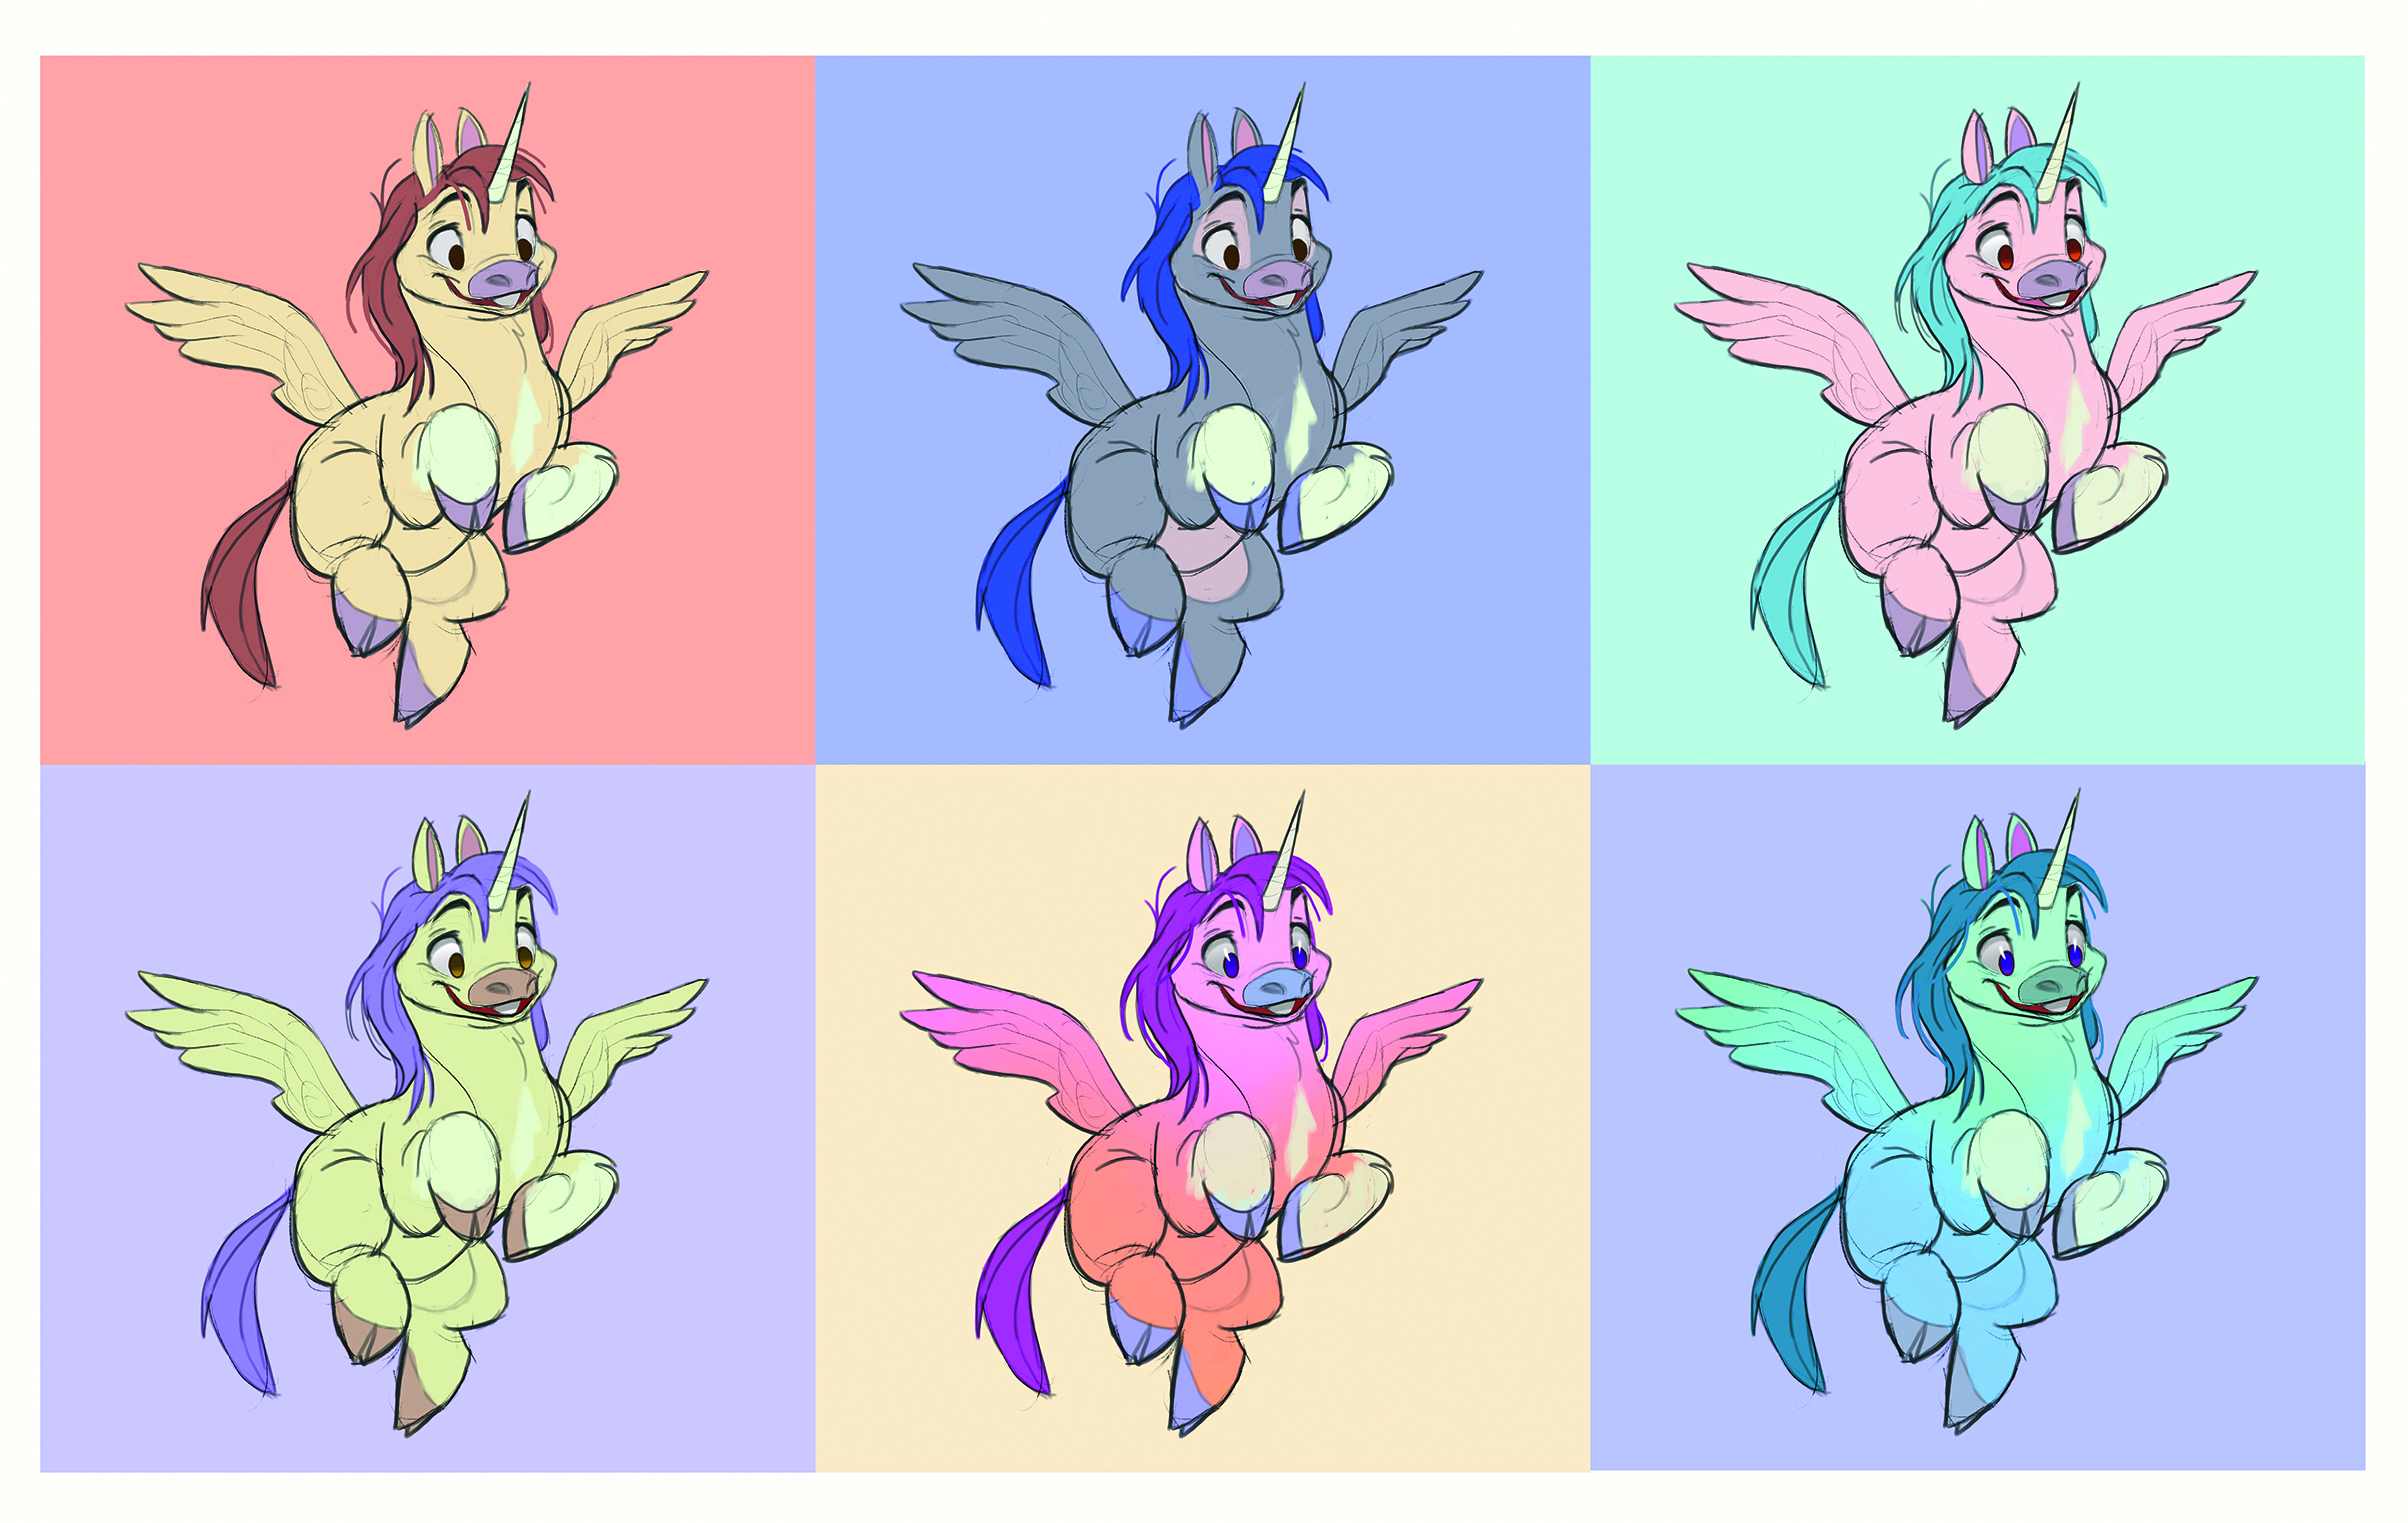
(Image: © Brian Weisz)
Colour is an essential tool used in storytelling. A character’s colour says a lot about who they are and determines how they come across visually. I recommend being experimental and bold at this stage.
Have fun playing with colours and use your creative instincts. Make a copy of your project and save each version separately, then see how many different variations you can discover!
Try to strike a balance in your colour harmony by using both warm and cool colours together. When submitting work to a client, only share the iterations that you’d be excited to work on further.
07. Roughing out the background
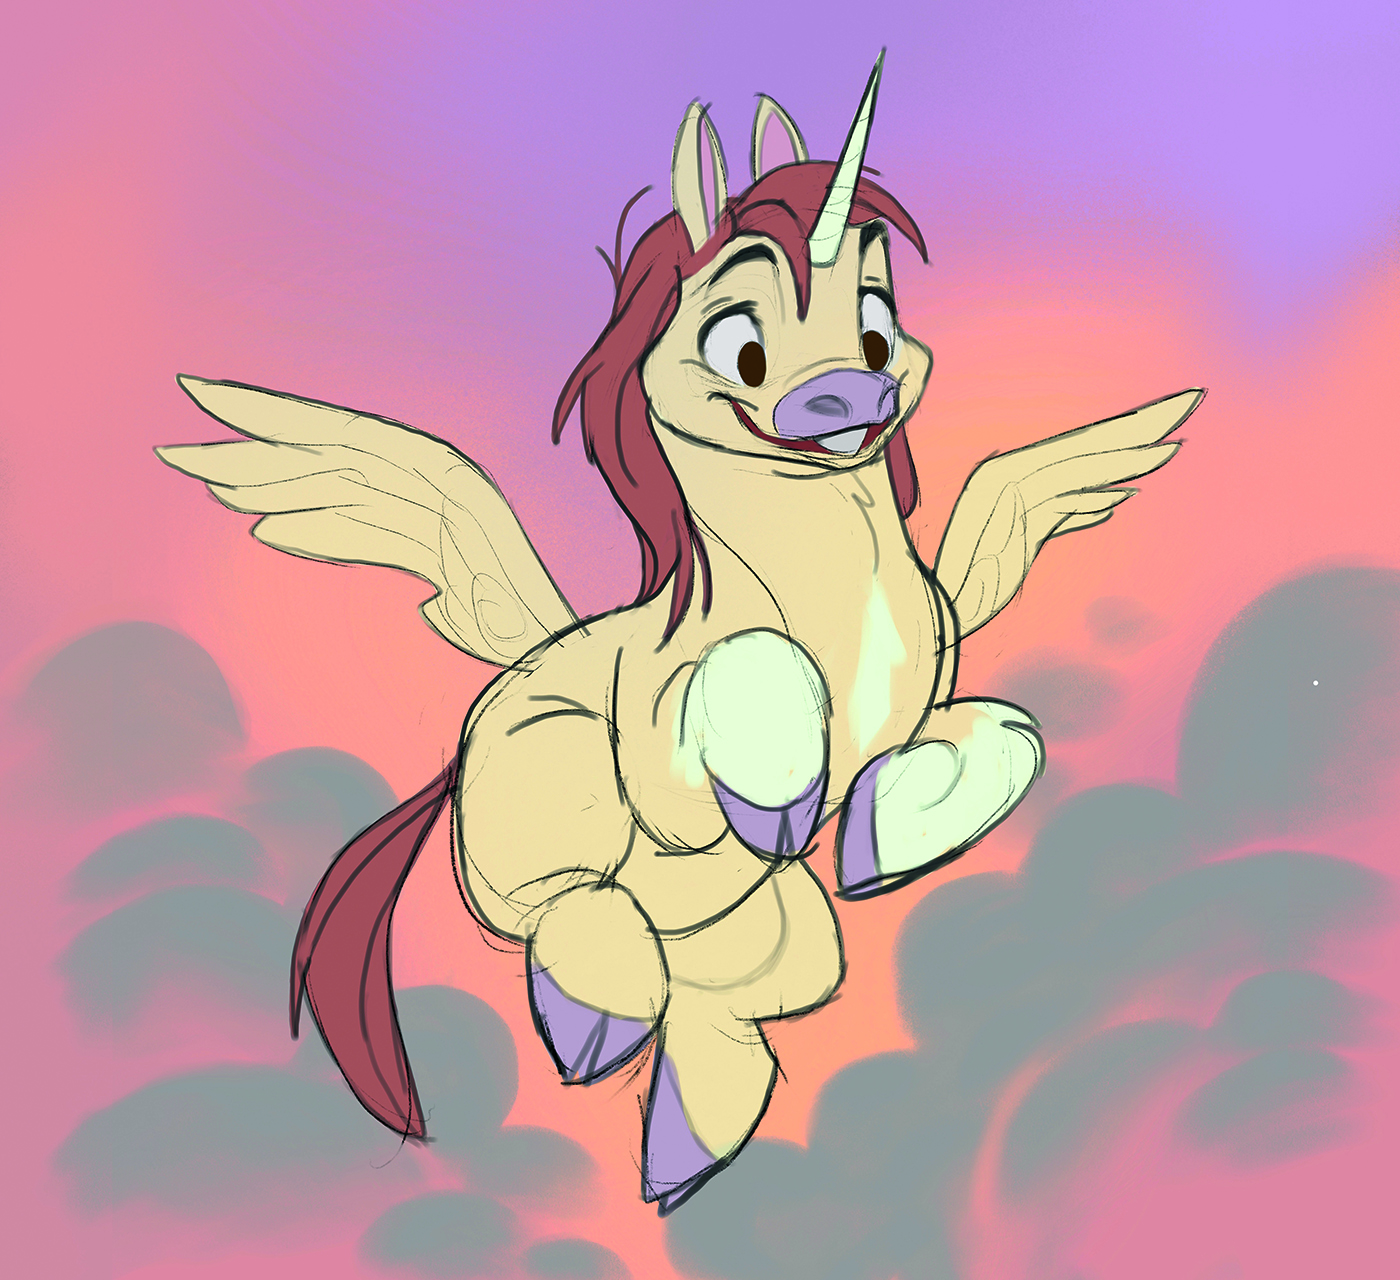
(Image: © Brian Weisz)
The background colours influence the colours of the character. Local colour creates atmosphere and connects the character to their environment. Choose a local colour or set of colours and begin roughing in the background to establish a general idea for the composition.
I like the Procreate Spray Paints Medium Nozzle brush when adding colour gradients to the sky, while for creating the clouds I used a charcoal style brush, so seek out something similar.
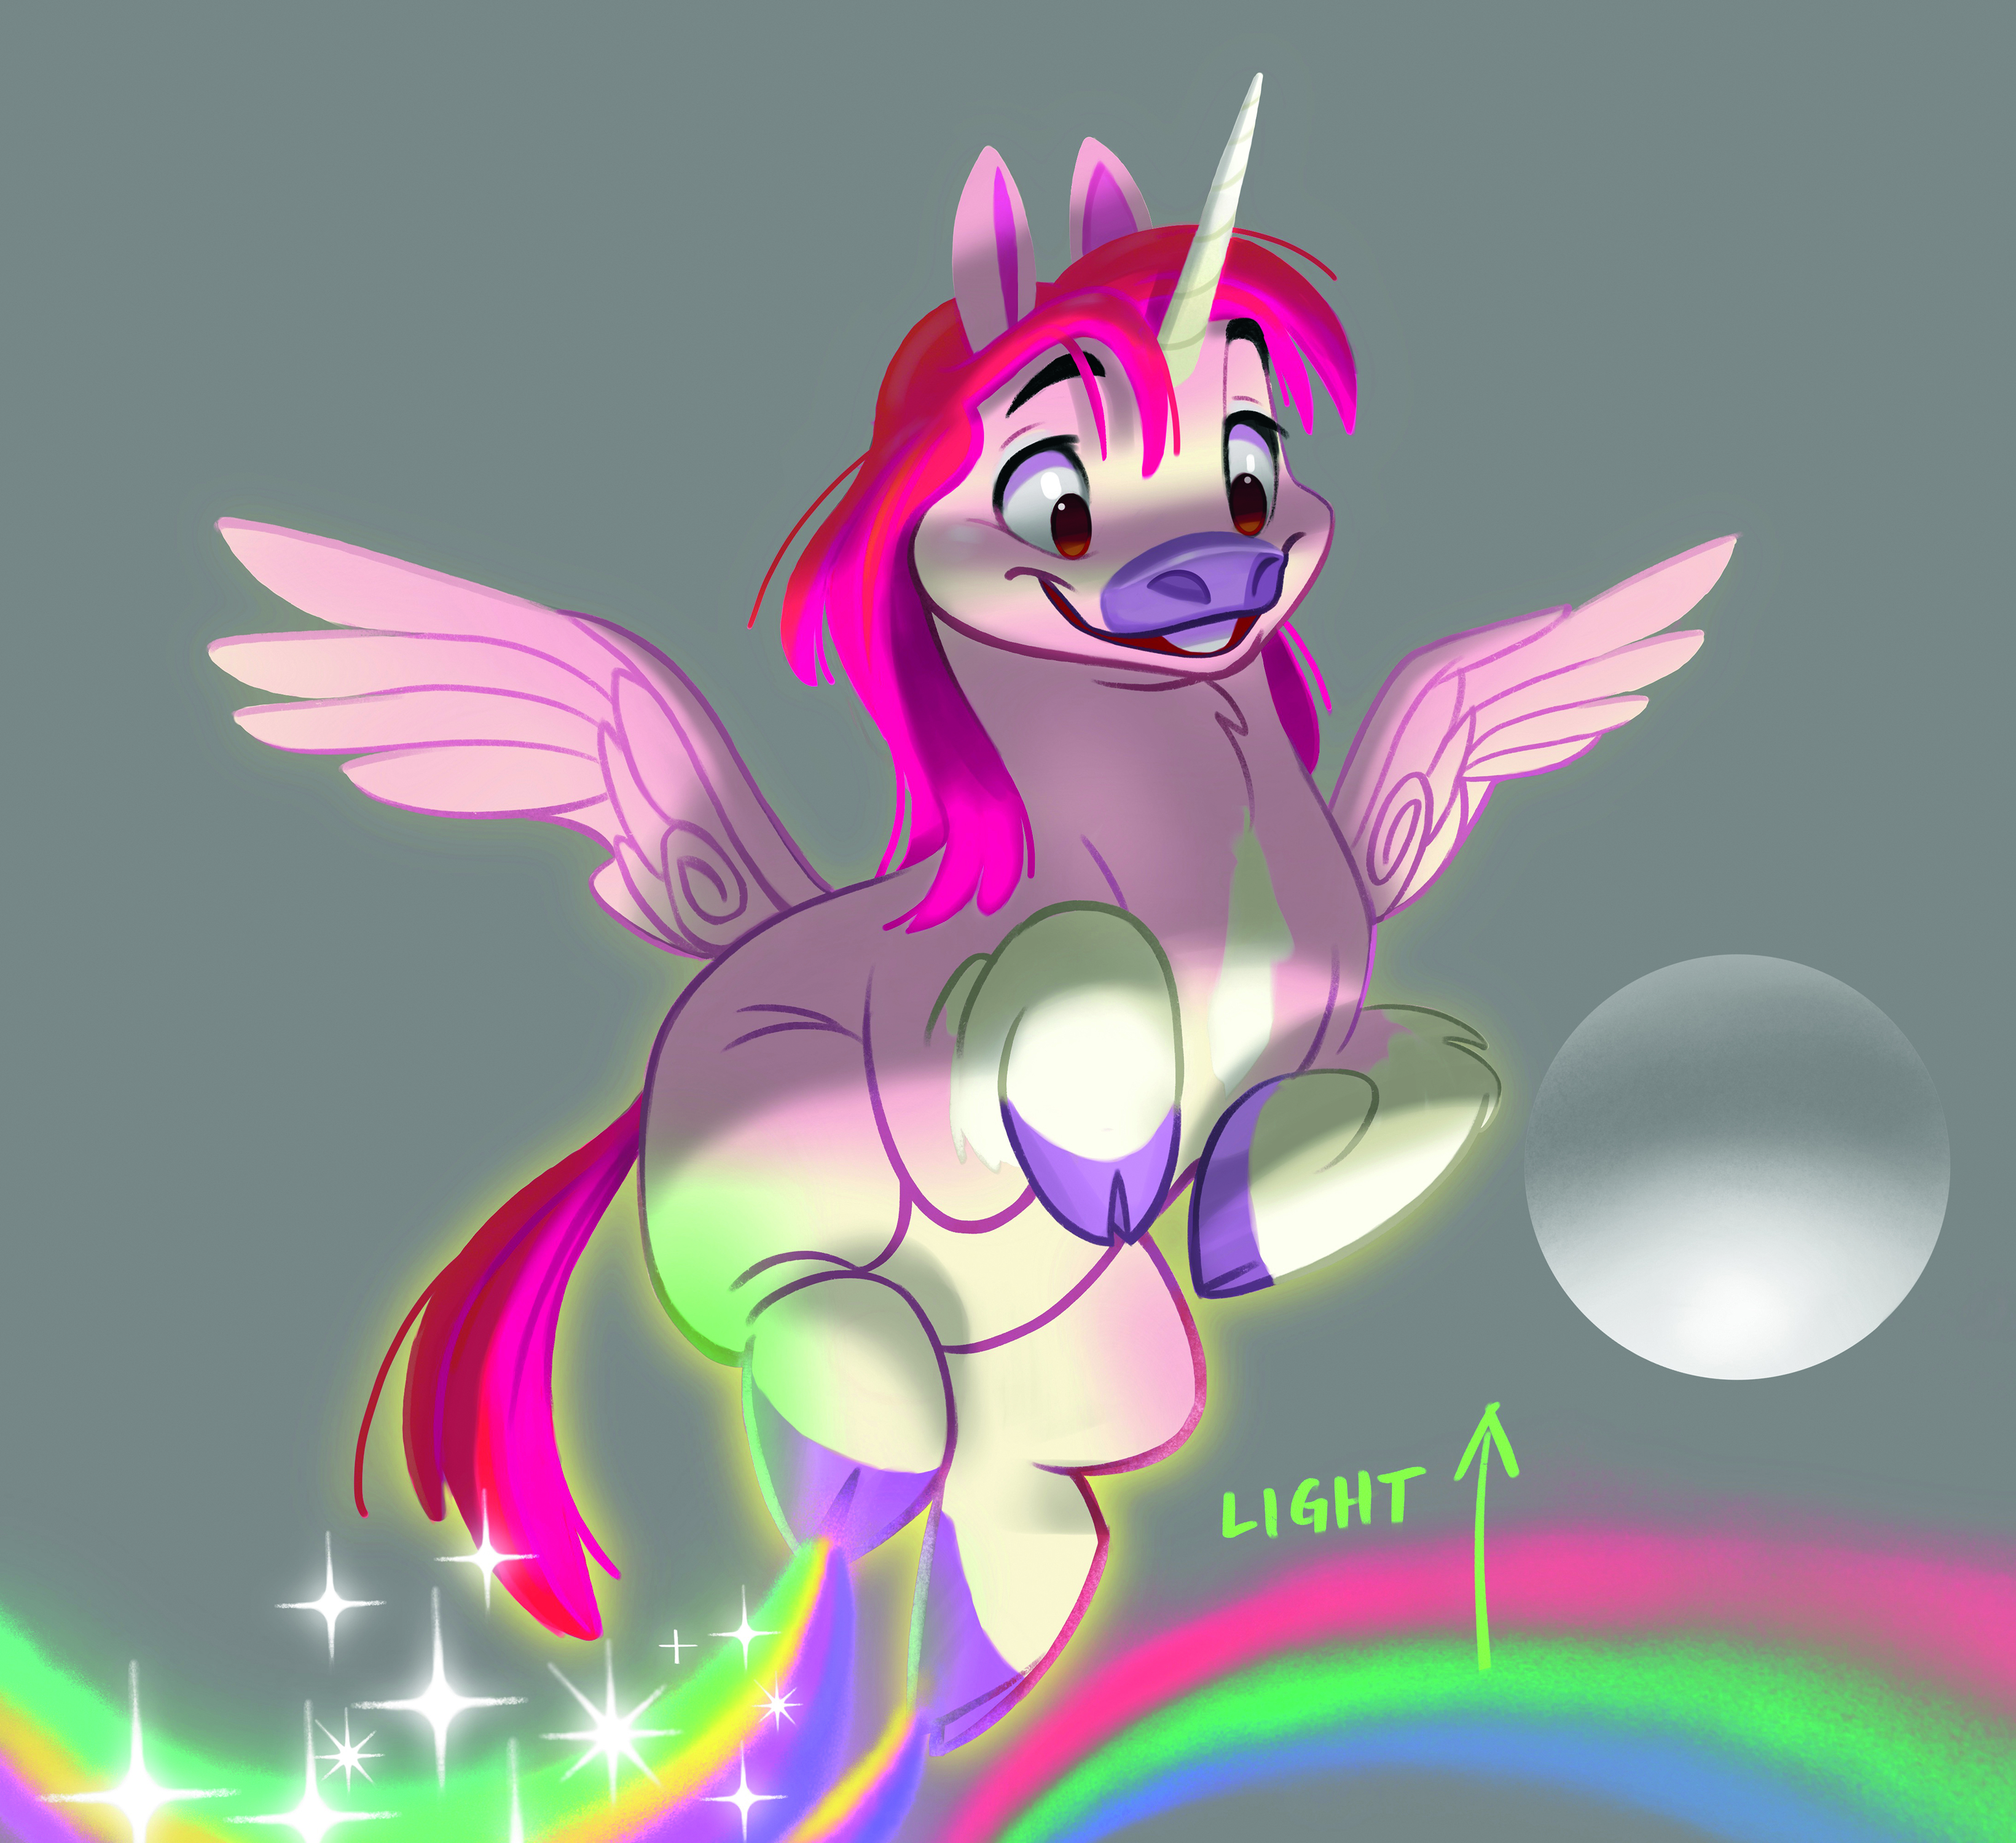
08. Establishing a light source
(Image: © Brian Weisz)
Dynamic lighting is a compositional tool that can add a lot of interest. You’ll need to consider both the direction of the light source and its intensity. With your silhouette layer selected, add a new layer at the top of your stack.
Now paint on top with a transparent black by turning the Opacity down. This allows you to experiment with shadows while your line work and colours are visible as you try out lighting scenarios.
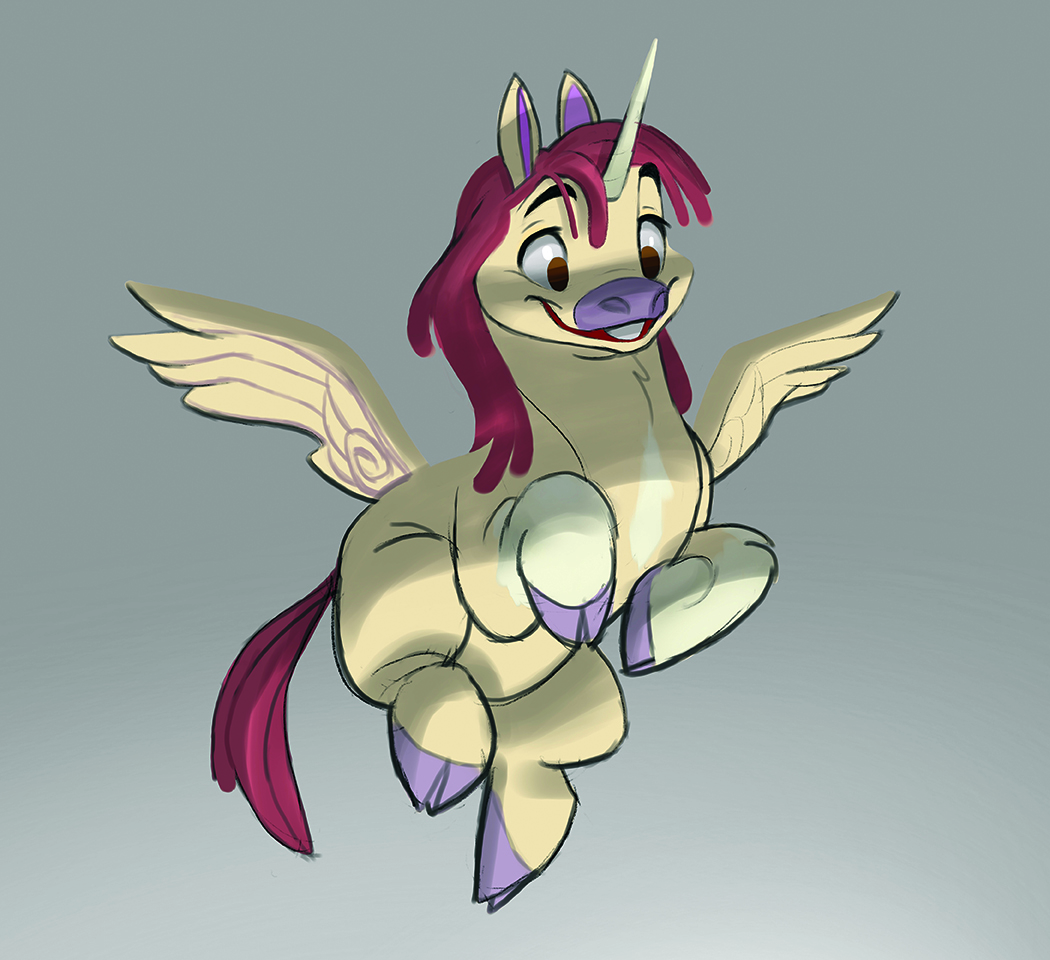
09. Tweaking the character
(Image: © Brian Weisz)
Every aspect of my design remains malleable throughout my process. Character adjustments are expected when dialling in the personality. In this example, I decided that the hair shape needed more mass.
The original hair shape was too small and made it look thin, when I needed the hair to be more playful and expressive. Creating shapes that are clear and decisive will make your character more legible and have a greater visual impact on the viewer.
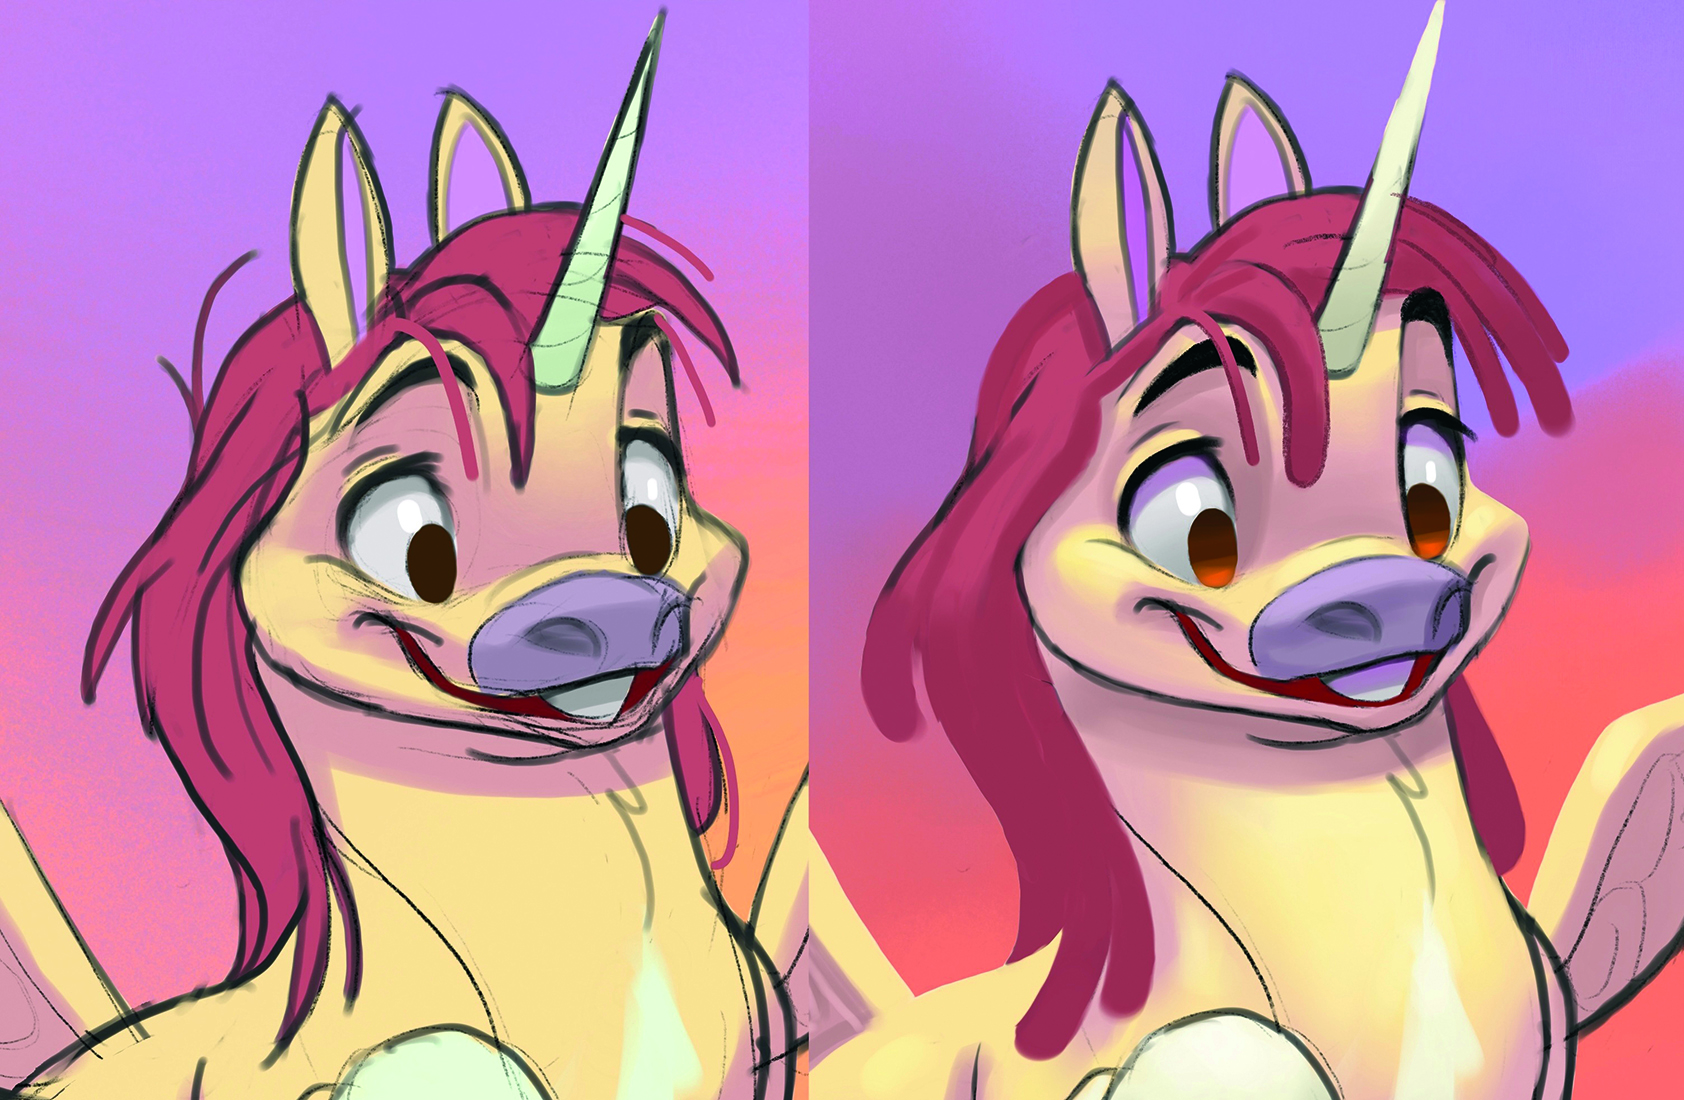
10. Fixing any mistakes
(Image: © Brian Weisz)
Drawing errors are going to happen, especially when loosely sketching in the beginning. When you notice a mistake, try adding a blank white layer on top of your project and turn the opacity down; it’s like putting tracing paper over your project.
Add another new layer on top so you can draw over and clearly see what you’re doing with the fix. Try flipping your image horizontally and looking at it in reverse, which will help you check for mistakes.
In this example, the angle of the eyebrow was slightly off when they should be symmetrical.
11. Making colour adjustments
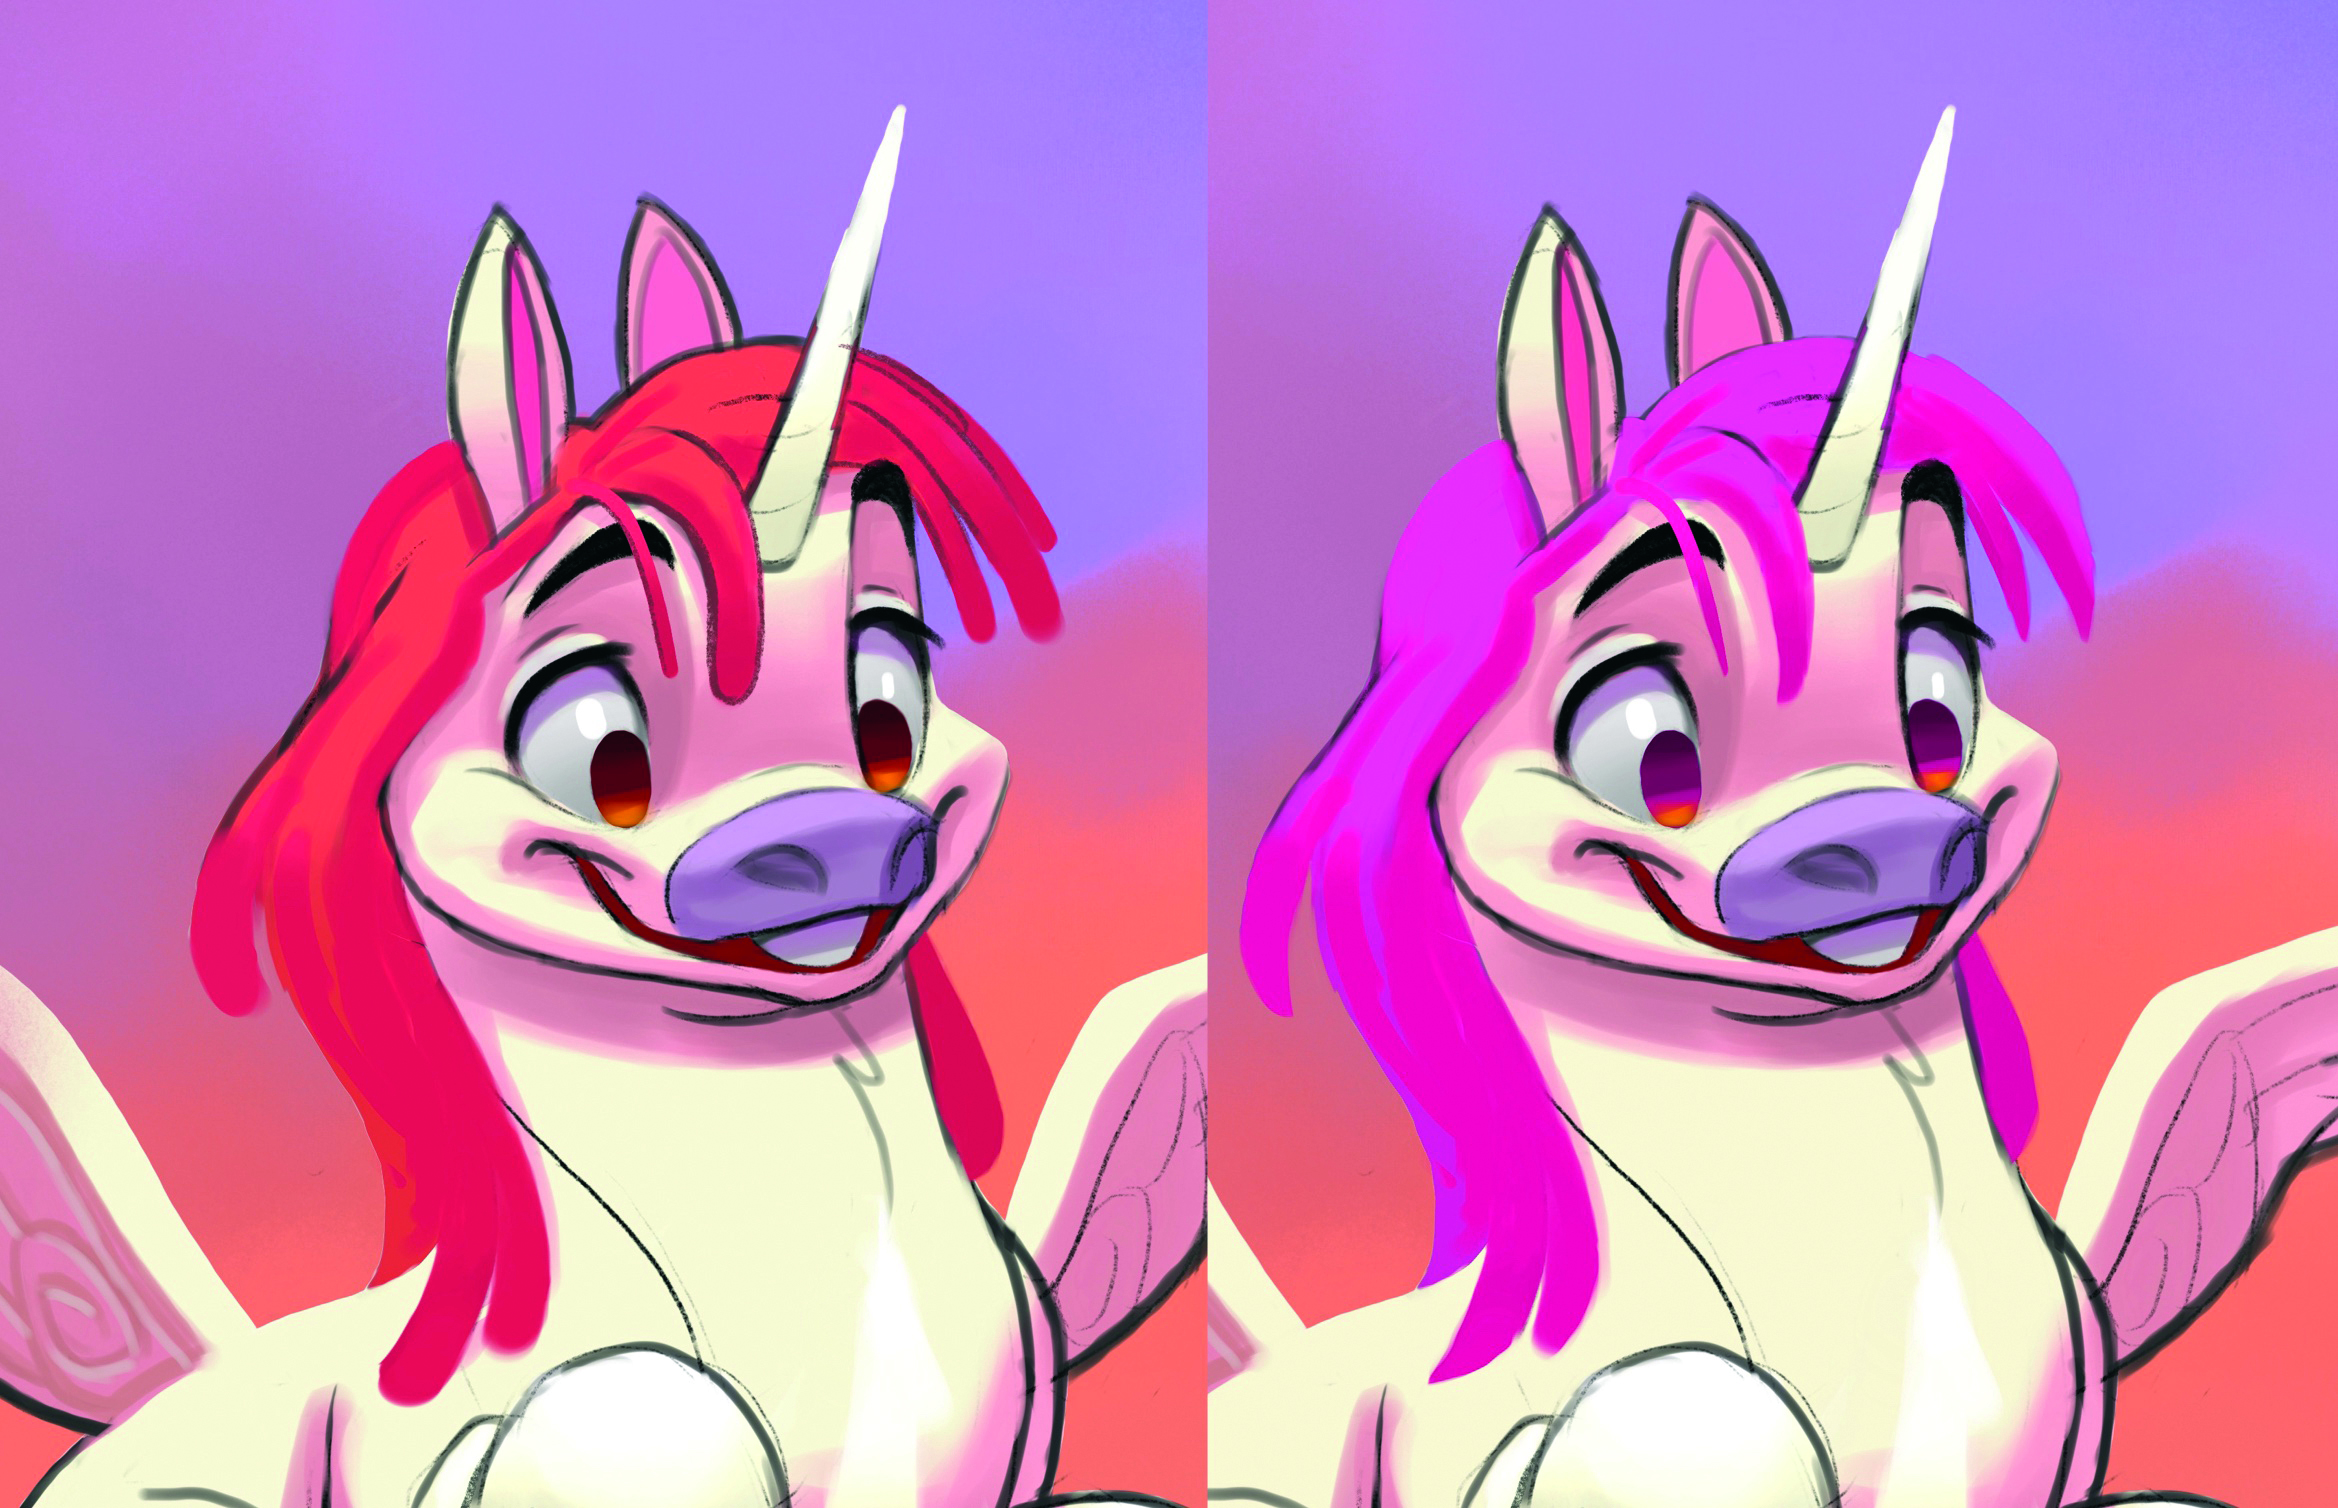
(Image: © Brian Weisz)
Getting notes from a client or art director is common, and being able to adapt and apply the feedback is part of the job. Sometimes your design choices aren’t what the client has in mind.
It’s a balancing act trying to fulfil the brief, bringing a client’s vision to life without compromising your own creative voice. Keep an open mind and remain flexible when taking feedback.
In this example, the colours of the character needed to be fine-tuned as they were too muted originally. The unicorn’s fur needed to be changed to a brighter, soft white, while the hair needed to become much more vivid and bold.
12. Working on depicting your character’s form
(Image: © Brian Weisz)
A sense of volume in your shapes makes a character more dynamic. Understanding how light and shadow work is necessary for depicting form. The illusion of form is made up of highlights, midtones, cast shadows, core shadows and reflected light.
It’s vital to work out which planes are facing upward and downward here, as well as balancing the tones and making sure there’s enough contrast to inform the light’s intensity.
13. Checking the artwork

(Image: © Brian Weisz)
Resolving a design is about achieving clarity, and strong observational skills are a key component when developing a final illustration or design. Look at your project in greyscale and in reverse, as you’ll see details that you otherwise wouldn’t if you only saw one angle.
A successful illustration or character design is made up of countless design choices during the process. The initial sketch is a starting point, as are the first colours you choose to employ. The art often happens as a response to those initial artistic choices you made.
14. Completing the image

(Image: © Brian Weisz)
After adding the sparkles, I realised that it’d be a missed opportunity to not give them more emphasis in the overall lighting design, so I decided the light source needed to change.
The new lighting also makes more sense with the low sunset in the background. To enhance the effect, I added more saturation and contrast to the rainbow and sparkles, while to get the glow effect of the sparkles I made a copy of the shiny star shapes and give it a Gaussian blur.
It’s important to take breaks from your assignment and come back to it with fresh eyes.
Get more tutorials in ImagineFX
.Organize the content with appropriate headings and subheadings ( h2, h3, h4, h5, h6). Include conclusion section and FAQs section with Proper questions and answers at the end. do not include the title. it must return only article i dont want any extra information or introductory text with article e.g: ” Here is rewritten article:” or “Here is the rewritten content:”